Have you ever painted a car? I hadn't and only had a rough idea on how to prepare a body for painting. But by now I know much of the ins and outs, thanks to fellow Dutchman and fellow (and multiple) Mini Marcos owner Joost van Diën, who is an excellent painter also. Joost happened to be in between jobs and managed to hire a professional spray booth to help me, and so we locked ourselves in for a week and spent most of the Christmas holidays in dust, working to get the body straight. Oh, I enjoyed every minute!
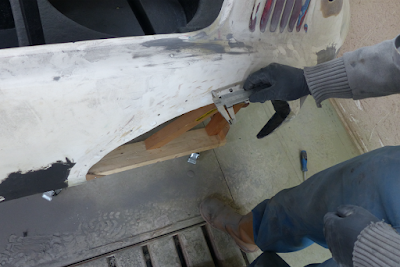
We also scratched our heads on how to fit the rear wheel arches properly. The ones I had refabricated needed trimming and finishing, but didn’t seem to fit perfectly to the body’s shapes. Historical photographs learned us that the edge where they touch the car’s body was originally thicker, also. We found a clever way to overcome all this. After having cut the arches to the right size, we taped in the wings where the arches touch the body, put a small stroke of filler on the arches, fitted them quickly and had the filler dry out. After an hour or so we removed the arches plus the tape and sanded all of the filler away, except for the edge. They now fit on to the body perfectly and have exactly the right thickness. I wouldn’t be surprised to learn when they were fitted the same way originally, too!
After days of sanding we were really happy with the result and both went home to celebrate Christmas. After Christmas we drove over once again to mask off all the holes and actually start applying the primer we had made by a real paint guru in Belgium, using the only original paint left now, to be found behind the car’s door locks, which is excellently conserved and thus perfect for colour matching. But that's for next week (with some videos, too).
We also scratched our heads on how to fit the rear wheel arches properly. The ones I had refabricated needed trimming and finishing, but didn’t seem to fit perfectly to the body’s shapes. Historical photographs learned us that the edge where they touch the car’s body was originally thicker, also. We found a clever way to overcome all this. After having cut the arches to the right size, we taped in the wings where the arches touch the body, put a small stroke of filler on the arches, fitted them quickly and had the filler dry out. After an hour or so we removed the arches plus the tape and sanded all of the filler away, except for the edge. They now fit on to the body perfectly and have exactly the right thickness. I wouldn’t be surprised to learn when they were fitted the same way originally, too!
Ready for action. Me in overals, Joost below. We used Gapol filler in two different colours, black first...
Picture Jeroen Booij (self-timing function...)
...and the slightly softer green later. Roof needed most filler, but we kept a slight dent that had always been there and could be seen on old photographs
Picture Jeroen Booij
Joost wasn't 100% happy with a repair carried out on the front and got out his fibreglass matting to do it again
Picture Jeroen Booij
The same went for the back end, which needed just a little more fine tuning on one spot before we'd get out the filler once more
Picture Jeroen Booij
Holes for spot lights needed repair also, carried out beautifully now. These were really difficult places to sand, especially after the epoxy resin had hardened out!
Picture Jeroen Booij
There was still original paint left on some places, amongst others in the louvres on the c-post. I did my utter best to get all out without damaging the original shapes
Picture Jeroen Booij
We found a clever way to fit the rear wheel arches perfectly. They had to be cut just a little first (lined out)
Picture Jeroen Booij
Measuring up the holes to pop rivet them on later. They all need to be similar in diamater
Picture Jeroen Booij
While removing some more paint leftovers on the door sill, a few bubble holes fell in the gellcoat. Although these have always been there, they were repaired as well
Picture Jeroen Booij
Joost's dad Cor enlighted us with some elbow grease, too. Thanks Cor!
Picture Jeroen Booij
Finished after a week of hard work and almost ready to receive its coat of primer
Picture Jeroen Booij
I had a fabulous time with Joost preparing the car for painting and learned an awful lot
Picture Jeroen Booij


Well done both of you.
ReplyDeleteTop Bloke that Joost Van Dien fellow.